

Quick answer: can I build my own solar power station in the UK?
Yes — and it costs significantly less than buying a branded all-in-one unit at equivalent capacity. A DIY system with a 100Ah LiFePO4 battery (1,200Wh), 20A MPPT charge controller, 1,000W pure sine wave inverter, and 200W solar panel costs approximately £350–£500 in components versus £600–£750 for a comparable all-in-one power station. The trade-off is time, basic electrical knowledge, and the absence of a single integrated warranty. This guide covers the complete component-by-component build.
Building your own solar power station is one of the most satisfying DIY electronics projects available. You understand exactly what is in it, you can expand it yourself, you save money at scale, and you gain skills that transfer directly to van builds, off-grid cabins, and emergency preparedness. For the all-in-one portable station route and outdoor use cases, see our home solar power UK guide.
DIY vs all-in-one power station — honest comparison
Quick answer: is it worth building a DIY solar power station?
Worth it if: you want maximum capacity per pound, you are comfortable with basic DC wiring, you want to understand the system fully, or you need a fixed installation (van, cabin, shed) where portability is not essential. Not worth it if: you want warranty coverage on the whole system, you need UPS (instant power cut switchover) functionality, you are a complete beginner, or you want something to take to festivals and camping — the all-in-one station wins for portability and polish.
| Factor | DIY component build | All-in-one power station |
|---|---|---|
| Cost per Wh (1,200Wh) | ~£0.30–£0.40/Wh | ~£0.55–£0.75/Wh |
| Electrical knowledge needed | Basic DC wiring, fusing | None — plug and play |
| Warranty | Per component (varies) | Single system warranty (2–5 yrs) |
| Portability | Poor — multiple components, heavy | ✅ Excellent — single unit with handle |
| UPS mode (power cut protection) | ❌ Not available without specialist hardware | ✅ Built in on EcoFlow DELTA 2 series |
| Expandability | ✅ Add panels, batteries freely | Limited to compatible expansion packs |
| Repairability | ✅ Replace individual components | ⚠️ Requires manufacturer service |
| App monitoring | Add-on (separate energy monitor) | ✅ Built in |
Every component explained
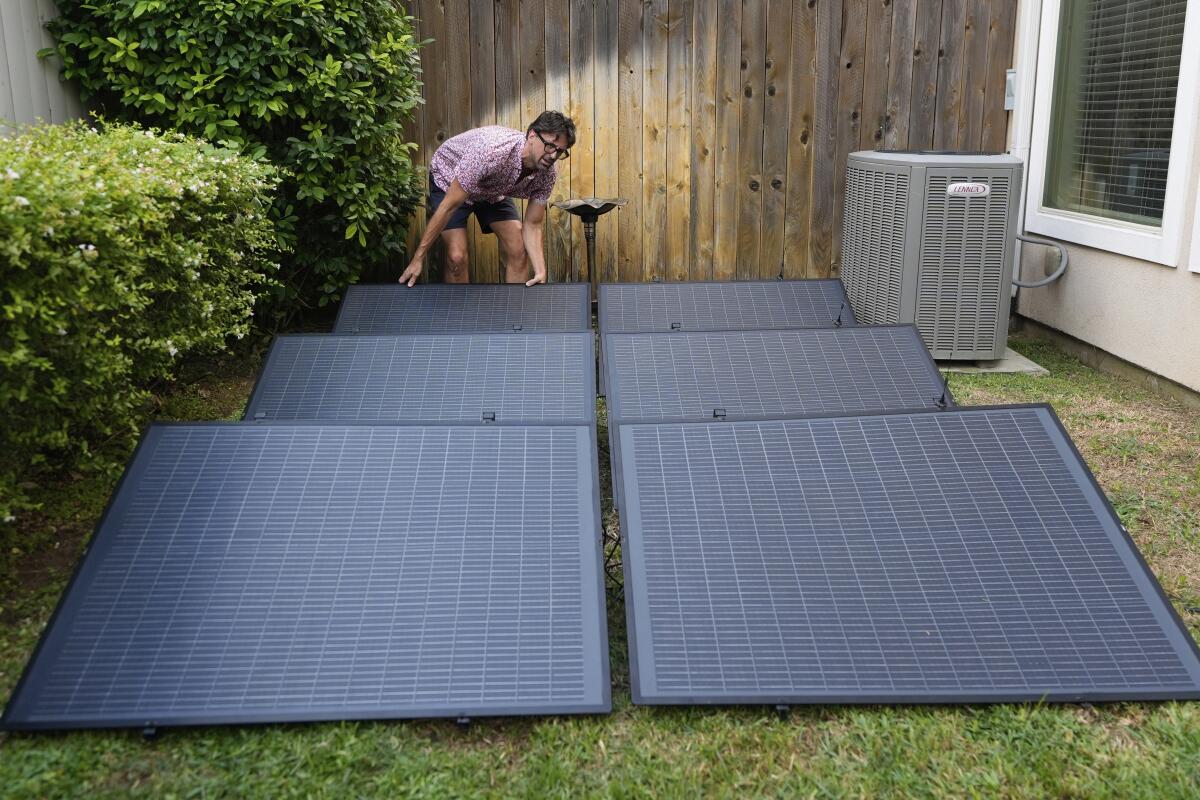
1. Solar panels
Quick answer: what solar panels do I need for a DIY build?
For a fixed installation (van roof, garden, shed): rigid monocrystalline glass-fronted panels with MC4 connectors. Renogy and ECO-WORTHY are the most popular UK DIY brands. Match panel voltage to your battery system — 12V panels (Vmp ~18V) for 12V systems, 24V panels (Vmp ~36V) for 24V systems. Higher voltage systems are more efficient over long cable runs.
- Renogy 100W rigid mono panel (~£60–£90)
- Renogy 200W rigid mono panel (~£100–£150)
- ECO-WORTHY 100W rigid panel (~£50–£80)
- 400W rigid mono panel (~£150–£220)
2. MPPT charge controller
Quick answer: what MPPT charge controller do I need?
Match the controller’s amperage rating to your panel array: divide total panel wattage by battery voltage to get amps. 200W ÷ 12V = 16.7A — use a 20A MPPT controller minimum. Always buy MPPT (not PWM) — MPPT extracts 20–30% more energy in real UK conditions. Renogy is the most reliable brand for UK DIY builds.
- Renogy Wanderer 20A MPPT (~£35–£55) — for up to 260W of 12V panels
- Renogy Rover 40A MPPT (~£65–£90) — for up to 520W of 12V panels
- Victron SmartSolar 75/15 (~£60–£80) — Victron quality, Bluetooth monitoring built in
3. Battery
Quick answer: what battery should I use for a DIY solar build?
LiFePO4 (lithium iron phosphate) — every time for any new build. 3,000–3,500 cycles (8–10 years of daily use), 100% depth of discharge without degradation, lighter than lead-acid, safer than NMC lithium. A 100Ah 12V LiFePO4 battery stores 1,200Wh usable — equivalent to a mid-range portable power station. Lead-acid is cheaper upfront but heavier, only 50% usable capacity, and 300–500 cycles. The lifetime cost of lead-acid is higher than LiFePO4 for regular solar cycling.
- 100Ah 12V LiFePO4 battery (~£120–£180) — 1,200Wh usable
- 200Ah 12V LiFePO4 battery (~£220–£320) — 2,400Wh usable
- Battle Born 100Ah LiFePO4 (~£700–£900) — premium US-made, 10-year warranty
4. Inverter
Quick answer: what inverter do I need for a DIY solar build?
Pure sine wave inverter only — never modified sine wave for home appliances. Size at 1.25–1.5× your peak simultaneous load. A standard home office (laptop + monitor + router + lights = 150W) needs a 300W minimum but a 1,000W inverter gives safe headroom for occasional larger loads like a kettle or vacuum cleaner.
- 300W pure sine wave inverter 12V (~£35–£60) — small loads only
- 1,000W pure sine wave inverter 12V (~£60–£100) — home office + occasional larger loads
- 2,000W pure sine wave inverter 12V (~£100–£180) — most household appliances
- Victron Phoenix 1,200W (~£200–£280) — premium build, reliable for permanent installs
5. Wiring, fuses, and safety hardware
- ANL fuse holder + 200A fuse (~£12–£20) — most critical safety item: between battery and inverter
- 25mm² battery cable (red + black, 1m each) (~£15–£25) — battery to inverter
- 4mm² solar cable 10m (red + black) (~£12–£20) — panel to charge controller
- MC4 connector tool kit (~£10–£18) — make proper weatherproof solar connections
- Battery isolator switch 500A (~£12–£20) — safely disconnect battery for maintenance
- Inline blade fuse holders (~£8–£15) — fuse panel-to-controller and controller-to-loads runs
Full shopping list — 1,200Wh DIY build
| Component | Specification | Recommended product | Approx. cost |
|---|---|---|---|
| Solar panel | 200W monocrystalline rigid | Renogy 200W | ~£100–£150 |
| MPPT charge controller | 20A MPPT, 12/24V auto | Renogy Wanderer 20A | ~£35–£55 |
| Battery | 100Ah 12V LiFePO4 with BMS | 100Ah LiFePO4 | ~£120–£180 |
| Inverter | 1,000W pure sine wave 12V | 1,000W PSW inverter | ~£60–£100 |
| ANL fuse + holder | 200A ANL | ANL fuse set | ~£12–£20 |
| Battery cable | 25mm² × 1m red + black | 25mm² cable | ~£15–£25 |
| Solar cable | 4mm² × 10m red + black | 4mm² solar cable | ~£12–£20 |
| MC4 connectors + tool | Standard MC4 pairs + crimper | MC4 kit | ~£10–£18 |
| Battery isolator switch | 500A 12V | Isolator switch | ~£12–£20 |
| Fuse holders (×2) | Inline blade fuse holders | Blade fuse holders | ~£8–£12 |
| Enclosure/box | Battery box or project case | Project enclosure | ~£15–£30 |
| Total | 1,200Wh / 1,000W AC | ~£399–£630 |
Wiring order — the correct sequence
Quick answer: in what order do I wire a DIY solar system?
Always wire in this order: Battery → Charge controller → Solar panels → Inverter. Never connect solar panels to a charge controller before the battery — this can damage the controller. Always fuse between battery and inverter before making that connection. Connect solar panels last.
- Battery to charge controller (BATT terminals): run fused cable from battery positive (+) through inline fuse, then to charge controller BATT+ terminal. Run negative direct to BATT− terminal. The controller should display the battery voltage immediately
- Charge controller LOAD terminals (optional): if using the controller’s 12V load output for 12V devices (lights, USB ports), connect here. Fuse this circuit too
- Solar panel to charge controller (PV terminals): run cable from panel MC4 connectors to PV+ and PV− terminals on controller. Controller will begin displaying solar input
- Battery to inverter: run 25mm² cable from battery positive through ANL fuse holder to inverter positive terminal. Run negative direct. Keep this cable as short as possible — 30cm is ideal, 1m maximum. Longer cables cause significant voltage drop at high current
- Test before enclosing: verify all connections, check controller display shows correct battery voltage and solar input, test inverter with a known load before sealing everything away
Safety rules — non-negotiable
Quick answer: is it safe to build a DIY solar system?
Yes with proper fusing and wiring. The primary risk is a short circuit between battery terminals — a fully charged 100Ah LiFePO4 battery can deliver thousands of amps into a short circuit, causing immediate fire. The ANL fuse between battery and inverter is the single most critical safety item in the entire build. Never work on a live battery without the isolator switch open. Always fuse every circuit. Never use undersized cable.
- 🔴 Always fuse between battery and inverter — ANL fuse rated for the cable capacity, not the inverter’s max draw
- 🔴 Never exceed cable current ratings — 25mm² handles ~170A, 16mm² handles ~110A, 6mm² handles ~50A
- 🔴 Use the battery isolator switch during all wiring work — disconnect battery before making or changing any connection
- 🔴 Do not connect solar panels before the battery is connected to the controller
- 🔴 Ventilate battery enclosures — even LiFePO4 releases minor gases on charging; sealed airtight enclosures are not recommended
- 🟡 Use ring terminals on all battery connections — never bare wire end directly on battery terminal posts
- 🟡 Label all cables clearly — red positive, black negative, with voltage and amperage ratings marked
Step-by-step build — from components to running system
- Lay out all components — dry-fit everything before cutting any cables. Confirm charge controller is in reach of both panel cable run and battery. Confirm inverter is close to battery (short cable run)
- Cut and terminate battery cables — cut 25mm² cable to length, crimp ring terminals on both ends. Fit ANL fuse holder in positive cable run, leave fuse OUT for now
- Connect battery to charge controller — insert fuse in controller’s battery fuse holder (if it has one), connect battery positive (fused) and negative to BATT terminals. Verify controller displays battery voltage
- Cut and terminate solar cables — run 4mm² cable from panel location to controller PV terminals. Crimp MC4 connectors on panel end if not already fitted, using the MC4 tool. Fuse in the positive solar cable run
- Connect panels to controller — click MC4 connectors together. Controller immediately shows solar input (point panel at sky to test). Voltage should read above battery voltage if charging
- Connect inverter — insert ANL fuse. Run 25mm² cables from battery terminals to inverter terminals, observing polarity. Keep cable runs as short as possible. Inverter should power on
- Test with a load — plug a known appliance into the inverter AC output. Monitor charge controller display — it should show battery charge state, solar input wattage, and load draw
- Mount and tidy — secure battery in a ventilated enclosure, tie cable runs, label everything clearly
12V vs 24V system — which should you build?
Quick answer: should I build a 12V or 24V solar system?
12V for small systems under 400W and short cable runs. 24V for anything larger. Higher voltage means lower current for the same power — which means thinner (cheaper) cables and less energy lost to resistance over distance. A 1,000W system at 12V draws 83A — requiring expensive thick cable. The same system at 24V draws only 42A — manageable with 16mm² cable. For van and cabin builds where cable runs exceed 3 metres, 24V is almost always the better choice at 400W+ capacity.
| System voltage | Best for | Current at 1,000W | Required cable (1m run) | Notes |
|---|---|---|---|---|
| 12V | Under 400W, short runs, portable builds | 83A | 25mm² | Simpler, more 12V accessories available |
| 24V | 400W–2,000W, van and cabin installs | 42A | 16mm² | More efficient, cheaper cabling at scale |
| 48V | Large systems 2kW+, house-level storage | 21A | 10mm² | Most efficient — requires 48V inverter |
Converting: watts, volts, amps — the three calculations you need
Quick answer: how do I calculate amps from watts in a solar system?
Amps = Watts ÷ Volts. This single formula sizes every component in your build. Examples: 200W panel on 12V system = 200 ÷ 12 = 16.7A — choose a 20A MPPT controller minimum. 1,000W inverter on 12V = 1,000 ÷ 12 = 83A — use 25mm² cable rated at 170A minimum and a 100A ANL fuse. 400W panel array on 24V system = 400 ÷ 24 = 16.7A — a 20A controller handles it with headroom.
| Calculation | Formula | Example |
|---|---|---|
| Amps from watts and volts | A = W ÷ V | 200W ÷ 12V = 16.7A |
| Watts from amps and volts | W = A × V | 20A × 24V = 480W |
| Runtime from capacity and load | Hours = Wh ÷ W (× 0.85 efficiency) | 1,200Wh ÷ 100W × 0.85 = 10.2 hrs |
| Battery capacity needed | Wh = Daily W consumption × Days autonomy ÷ 0.8 (DoD) | 1,000Wh × 2 days ÷ 0.8 = 2,500Wh |
| Panel array size needed | W panels = Daily Wh ÷ Peak sun hours | 1,000Wh ÷ 4hrs = 250W panels minimum |
Three complete DIY builds — small, medium, large
Small build — portable emergency/camping (£200–£320)
Quick answer: what is the cheapest functional DIY solar build?
A 100W panel, 20A PWM controller (acceptable at this small scale), 50Ah 12V LiFePO4 battery (600Wh usable), and 300W pure sine wave inverter costs approximately £180–£280 in components. Fits in a milk crate or project case. Powers phone/laptop charging, LED lights, and a small fan indefinitely on solar in summer. Not suitable for large appliances — this is a survival/emergency build.
| Component | Spec | Cost | Link |
|---|---|---|---|
| Panel | 100W rigid mono | ~£55–£80 | Amazon |
| Controller | 10A PWM (acceptable at 100W/12V) | ~£12–£20 | Amazon |
| Battery | 50Ah 12V LiFePO4 | ~£70–£100 | Amazon |
| Inverter | 300W pure sine wave 12V | ~£35–£55 | Amazon |
| Fuse + wiring | ANL 100A + 16mm² cable | ~£15–£25 | Amazon |
| Total | ~600Wh / 300W AC | ~£187–£280 |
Medium build — home office / shed / van (£380–£580)
This is the sweet spot of the DIY solar world — the build already detailed in the main shopping list above. 200W panel, 20A MPPT, 100Ah LiFePO4, 1,000W inverter. 1,200Wh usable, 1,000W AC output. Covers home office, van essentials, festival power, and emergency home backup. The most popular UK DIY solar build.
Large build — cabin / static caravan / serious van (£800–£1,400)
| Component | Spec | Cost | Link |
|---|---|---|---|
| Panels (×4) | 4× 200W rigid mono = 800W | ~£380–£520 | Amazon |
| Charge controller | 40A MPPT 12/24V auto | ~£65–£95 | Amazon |
| Battery (×2) | 2× 100Ah 24V LiFePO4 in series = 2,400Wh | ~£300–£450 | Amazon |
| Inverter | 2,000W pure sine wave 24V | ~£100–£180 | Amazon |
| ANL fuse + 25mm² cable | 200A ANL + cable set | ~£30–£50 | Amazon |
| MC4 combiner box | 4-string MC4 combiner | ~£20–£35 | Amazon |
| Battery isolator switch | 500A 12/24V | ~£15–£25 | Amazon |
| Total | ~2,400Wh / 2,000W AC | ~£910–£1,355 |
Wiring batteries in series and parallel
Quick answer: should I wire batteries in series or parallel?
Series wiring doubles the voltage (two 12V batteries = 24V system). Parallel wiring doubles the capacity (two 100Ah batteries = 200Ah at the same voltage). For a 24V system with 12V batteries: connect positive of battery 1 to negative of battery 2 (series) — the output taps from battery 1 negative and battery 2 positive. For more capacity at 12V: connect both positives together and both negatives together (parallel). Always use matched batteries of identical age, capacity, and chemistry when combining.
| Wiring type | Voltage effect | Capacity effect | Example |
|---|---|---|---|
| Series (+ to −) | Multiplies (×number of batteries) | Stays the same | Two 12V 100Ah = 24V 100Ah (1,200Wh usable) |
| Parallel (+ to +, − to −) | Stays the same | Multiplies (×number of batteries) | Two 12V 100Ah = 12V 200Ah (2,400Wh usable) |
| Series-parallel (combined) | Multiplies for series group | Multiplies for parallel groups | Four 12V 100Ah in 2S2P = 24V 200Ah (4,800Wh usable) |
Charge controller settings — what to configure
Quick answer: how do I configure an MPPT charge controller for LiFePO4?
Set the battery type to Lithium / LiFePO4 on the controller (most modern MPPT controllers have a LiFePO4 preset). Key voltage settings for a 12V LiFePO4 system: Absorption voltage: 14.2–14.6V. Float voltage: 13.5–13.8V. Low voltage disconnect: 10.5–11.0V. Never use lead-acid charging profiles for LiFePO4 — the voltage profiles differ significantly and using the wrong profile reduces battery life. Renogy, Victron, and Epever MPPT controllers all have LiFePO4 presets. Browse Renogy MPPT controllers on Amazon.
| Setting | 12V LiFePO4 | 24V LiFePO4 | Why it matters |
|---|---|---|---|
| Absorption voltage | 14.2–14.6V | 28.4–29.2V | Full charge voltage — top-balances cells |
| Float voltage | 13.5–13.8V | 27.0–27.6V | Maintenance voltage after full charge |
| Low voltage disconnect | 10.5–11.0V | 21.0–22.0V | Protects battery from deep discharge |
| Equalisation | Disable | Disable | LiFePO4 does not require equalisation — can damage cells |
Troubleshooting your DIY build
| Problem | Likely cause | Fix |
|---|---|---|
| Controller shows no solar input | Wrong polarity on PV terminals, blown fuse, shading | Check polarity with multimeter, replace fuse, reposition panel |
| Battery not charging from solar | Battery voltage too low for controller to accept, wrong settings | Boost battery from mains first, then check controller battery type settings |
| Inverter cuts out under load | Battery voltage sags under high current draw — undersized cable or low battery | Check battery voltage under load, increase cable size, check battery health |
| Panel generates less than expected | Shade, dirty panel, wrong tilt, temperature | Measure Voc with multimeter, clean panel, adjust tilt angle, check for shade |
| ANL fuse blows repeatedly | Inverter draws exceed fuse rating, or short circuit | Check inverter peak draw, size fuse to cable rating not inverter rating |
| Battery drains overnight with no load | Inverter parasitic draw, charge controller standby draw | Switch off inverter when not in use — most inverters draw 1–5W standby even with no AC load |
| Controller reports battery full but it discharges quickly | Battery cell imbalance, BMS issue, actual capacity lower than rated | Do a full discharge test to measure actual usable capacity |
Maintaining your DIY system
Quick answer: how do I maintain a DIY solar system?
Annual checks: inspect all cable terminations for corrosion or looseness, clean panel surface, check battery terminal connections are tight, verify controller settings have not reset, test inverter at full rated load for 5 minutes. Monthly: check battery state of charge reporting against actual use. Seasonally: adjust panel tilt angle for summer (30–35°) and winter (40–45°) to maximise seasonal generation. LiFePO4 batteries require no equalisation or water top-up — they are truly maintenance-free in normal operation.
Annual maintenance checklist
- ☐ Clean panel surface with damp cloth — remove dust, bird droppings, leaf debris
- ☐ Check all MC4 connections are fully clicked and locked
- ☐ Inspect battery terminals — clean any white corrosion with baking soda solution, retighten
- ☐ Verify ANL fuse is seated correctly in holder
- ☐ Check charge controller display — battery voltage, solar input, settings not reset
- ☐ Test inverter at rated load for 5 minutes — check for overheating or unusual noise
- ☐ Inspect cable runs for any abrasion, rodent damage, or UV degradation
- ☐ Adjust panel tilt for the season — steeper in winter (40–45°), shallower in summer (30–35°)
Tool kit for ongoing maintenance
- Digital multimeter — test voltage at every stage, essential for fault diagnosis
- Panel cleaning kit — soft squeegee and extending handle for roof-mounted panels
- Battery terminal cleaner — corrosion inhibitor spray and brush
- MC4 connection tester — verify panel connections without multimeter probing
When to abandon DIY and buy all-in-one
DIY is the right choice when: you want maximum capacity per pound at 1,000Wh+, you are building a permanent van or cabin installation, you want full repairability, or you enjoy the project. Buy all-in-one when: you need UPS power cut protection (30ms switchover), you want a single warranty, you are a complete beginner, you need something portable for festivals and camping, or the system is under 1,000Wh where the DIY saving is minimal.
The EcoFlow DELTA 2 (1,024Wh, ~£650) and the equivalent DIY build (1,200Wh, ~£430) — at 220W of additional capacity for £220 more, the all-in-one wins for most buyers who value their time and want a clean plug-and-play result.
Additional frequently asked questions
What tools do I need to build a DIY solar system?
Wire cutters, wire strippers, crimping tool (for ring terminals and MC4 connectors), screwdrivers, a digital multimeter, and drill if mounting panels. Browse MC4 crimp tool kits on Amazon. A ratchet crimper for ring terminals is worth the £15 investment — poor crimps cause resistance, heat, and potential fire at battery connections.
Can I use AGM batteries instead of LiFePO4?
AGM (Absorbent Glass Mat) lead-acid batteries are workable for DIY solar but inferior to LiFePO4 for regular cycling. AGM delivers approximately 300–500 cycles before significant capacity loss, versus 3,000–3,500 for LiFePO4. AGM is also only 50% usable depth of discharge safely — a 100Ah AGM delivers 50Ah usable versus 100Ah from LiFePO4. The price difference has narrowed significantly — LiFePO4 is now the clear right choice for any new build.
Do I need an RCD or RCBO in my DIY solar build?
For a purely 12V DC system (no 240V AC output): no RCD required. For systems with an inverter producing 240V AC: an RCBO (Residual Current Breaker with Overcurrent) on the AC output circuits is best practice and required if the system feeds fixed socket outlets that people will use regularly. A fused, switched socket strip connected directly to the inverter output provides basic protection for portable use. Browse RCBO breakers on Amazon.
How do I monitor my DIY solar system remotely?
The best budget monitoring: Victron SmartSolar MPPT controllers include built-in Bluetooth monitoring via the VictronConnect app — real-time panel input, battery state, and historical data on your phone. Renogy controllers pair with a BT-1 Bluetooth module (~£15) for the same functionality. For full remote monitoring over Wi-Fi: the Victron Cerbo GX (~£150–£200) is the benchmark for serious van and cabin installations.
Testing your system
Essential tests before relying on the system:
- Open circuit voltage: disconnect panels and measure with multimeter — should match panel’s stated Voc ±5%
- Charge rate test: on a clear day, confirm controller shows solar input close to panel’s rated wattage
- Inverter load test: run a resistive load (heater or kettle) at the inverter’s rated output for 5 minutes — check for heat, unusual noise, or voltage drop
- Battery discharge test: run a known load from full battery and time how long it runs — cross-check against calculated runtime
Related guides
- ☀️ Home Solar Power UK — all-in-one station guide
- 🔋 Best Portable Power for Camping UK
- 🏕️ Off-Grid Solar for Cabins and Caravans
Frequently asked questions
Is it legal to build a DIY solar power station in the UK?
Yes — for an off-grid portable system (panel, battery, inverter not connected to the mains grid), there are no legal restrictions. It is treated as a standalone electrical appliance. If you want to connect your DIY system to your home’s wiring circuits, this requires a qualified electrician and G98 notification, the same as any grid-connected solar system.
What is the cheapest way to build a solar power station?
100Ah 12V LiFePO4 battery (~£130) + 20A MPPT controller (~£40) + 1,000W pure sine wave inverter (~£70) + 200W rigid panel (~£120) + wiring and fuses (~£50) = approximately £410–£500 for a 1,200Wh system. This significantly undercuts equivalent all-in-one power stations which typically cost £600–£750 for the same capacity.
What is the best battery for a DIY solar build?
LiFePO4 for any system that will cycle regularly. A 100Ah 12V LiFePO4 (1,200Wh usable) is the most practical size for a first build. Browse LiFePO4 batteries on Amazon. Avoid lead-acid for solar cycling — low cycle life and only 50% usable capacity make the lifetime cost higher than LiFePO4.
Can I use a car battery for a DIY solar build?
A standard car battery (SLI — starting, lighting, ignition) is not suitable for solar storage cycling. Car batteries are designed for short, high-current starting bursts and degrade rapidly if cycled (discharged and recharged) regularly. Use a deep-cycle leisure battery or LiFePO4 instead. A leisure lead-acid battery is workable as a budget starter option but delivers far fewer cycles than LiFePO4.
Discover more from The Mosh Manual
Subscribe to get the latest posts sent to your email.


2 thoughts on “DIY Solar Power Station Build UK 2026: Under £500 Component-by-Component Guide”